Instagram
Follow on Feedspot
Follow on Bloglovin
Nicoles Nails

Thursday 29 May 2014

The Chevron Mani

Hi everyone, welcome to this evenings post :) today I've got a chevron design to show you, with my favourite polish at the mo, BarryM's 'Green Berry'. 


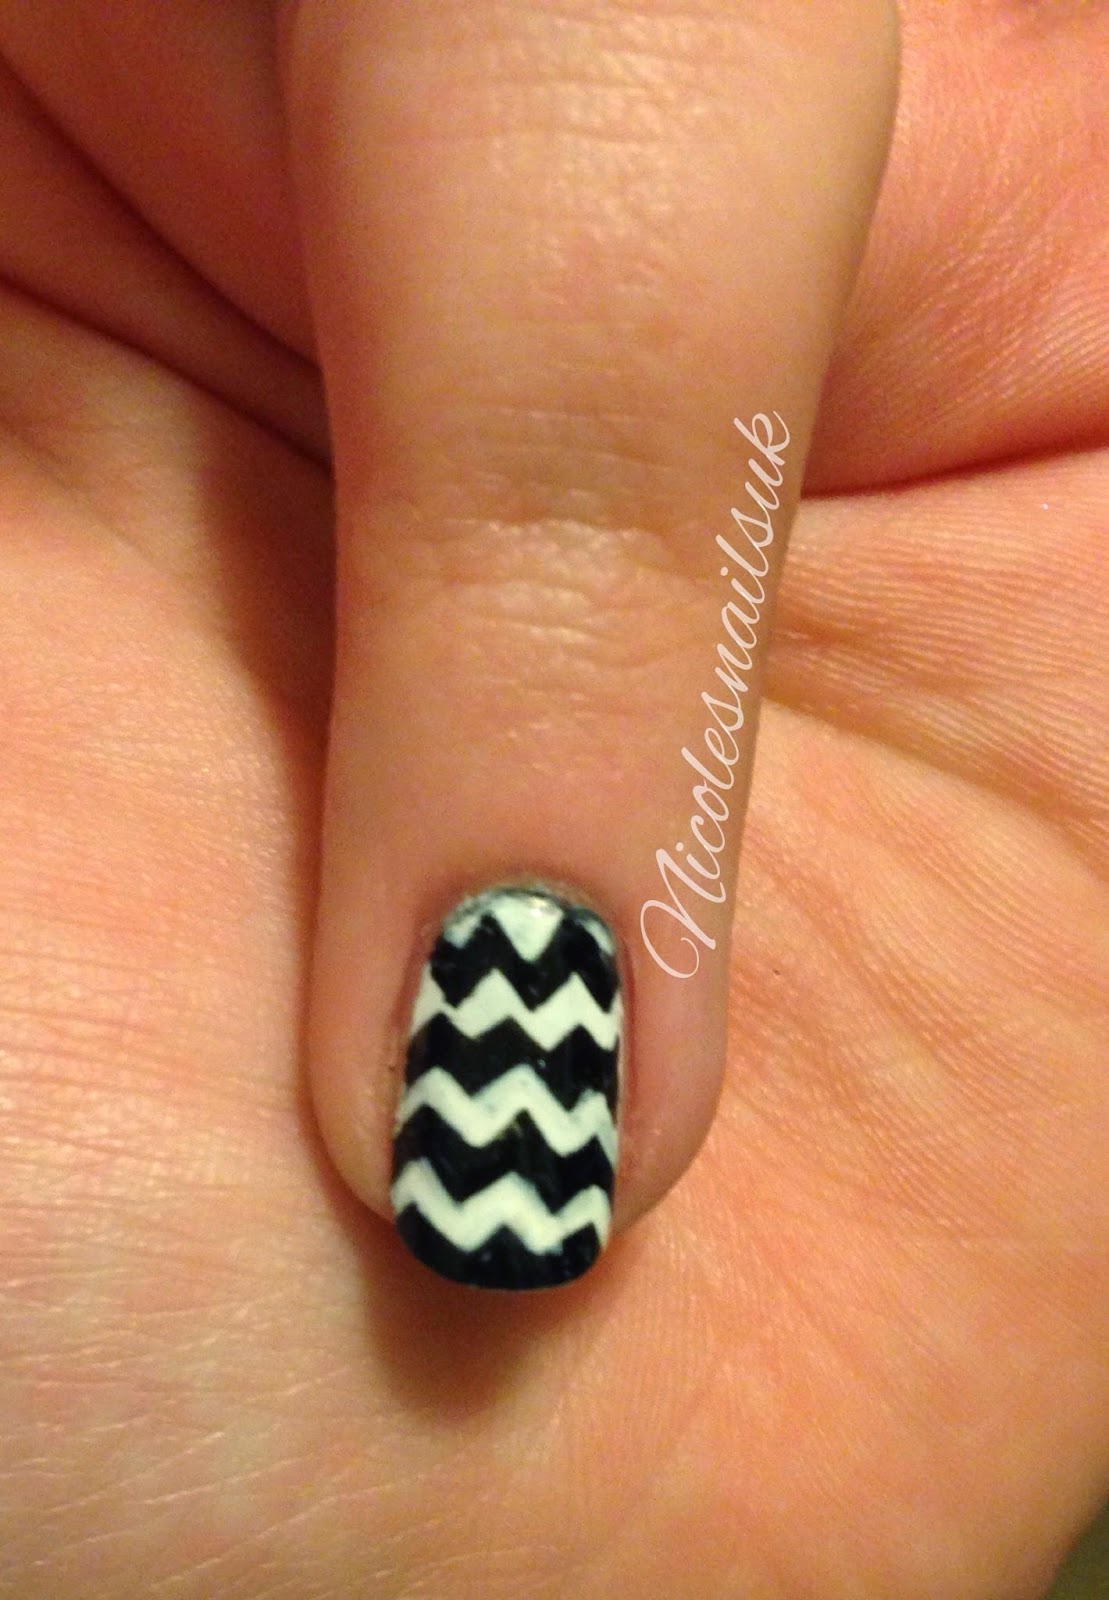
I love doing a chevron mani, but they are soo fiddly and time consuming! You can see my tutorial here. The tutorial is a slightly simpler version as the zig zags aren't as small. The smaller the little triangles you cut out are, the more zig zags you get, but the harder it is! 


I love how you can create this look with any combination of colours, and I really love using such eye catching colours like in this version. I think the contrast between the black, white and turquoise works really well, and is really effective! 


So I hope you like my chevron design, see you soon for more manis! 

Nicole x 

Sunday 25 May 2014

The Naked Mani (well, almost!)

Hey everyone, welcome to today's post. Today I've got my nearly naked mani to show you. Now I always, without fail, have nail polish on. So having just nude polish was even weird for me. And because I can't just go with something simple, I had to add an accent nail as usual. 


I used BarryM's 'nude' for the base colour, which is my favourite nude polish. It goes on lovely and smooth, dries quickly and has a gorgeous shine to it. I then used some nail glue to add a small pink bow onto my ring finger. This created a really cute, simple mani that I was really pleased with. 


Now my new obsession is 'upcycling' manis. After a couple of days I get bored of the mani, but don't neccessarily want to change it, or don't have much time. So I change it in some sort of way. 


With this mani after a couple of days I wanted something a bit different but wanted to keep the bow so I added a white tip to create a French manicure look. Then the next day I wanted another change, so I used BarryM's Superdrug birthday addition to cover the white tips, creating a pink French mani. 


This created a completely different look, which I still loved. I hope you like today's naked and upcycled mani. Come back soon to see more designs.

Nicole x 


Monday 19 May 2014

Posh Pink Post!

Evening everyone! Welcome to today's 'posh pink!' post :) for this mani I've used my favourite polish at tho mo... BarryM's 'shocking pink' which is a lovely bright summery polish. I've also used my new gems, which have a slight rainbow effect to them (not that you can see it on the stupid camera).


Now I started this mani with a base coat of BarryM's 'nude' so the piece of nail showing at the base of my nail still looked nice. I then sectioned off that section and applied the pink. (tutorial for this type of mani coming soon!) 


Next I added the gems around the nude section, using top coat as glue. I also added a larger gem in the middle to create a slight pattern amongst the gems. 


So I hope you like this mani. I loved having it on and spent the whole time trying to show it off haha! 

Nicole x 

Friday 16 May 2014

Wildlife Mani

Hey everyone! Today I've got something a bit different for you to have a look at. My mani today I treated more like doing a painting of piece of artwork, rather than nail art. You'll also have to ignore the unfinished look of the mani in the pictures! I took them before completely tidying the edges and then completely forgot to retake them before I removed the design! Silly me! Anyway...

I started off with BarryM's 'Pearl' from their Silk range for the base colour. You can see some swatches from the Silk range here. I then used actual Acrylic paints for the designs on each finger.


Acrylics work so much better than normal nail polish for these sort of designs because they go onto the nail so much better and thicker than a polish, so there's no need to go over a design again and again to make it darker. Acrylics also allow you to blend colours and make new colours to suit your design. Also if you make a mistake you can correct it with water, but nail polish remover also works when taking the whole design off. 


I've gone with a wildlife type theme for this mani and decided to put something different on each finger. My favourite has to be how my thumb nail turned out though, will the small butterfly and flower :)


So I hope you like today's design, I really enjoyed doing something a bit different for you to see and I loved working with the Acrylic paints for a change!

Nicole x 


Tuesday 13 May 2014

Tutorial Time!

Hi everyone, today I've got a lovely little tutorial for you to try at home. I've used BarryM polishes for this (surprise, surprise!) and my BarryM black nail art pen. 


Now you can do this in whatever colours you want, but I find the black and white works really well. First paint your nails black, and wait until the polish is completely dry. 

Next you'll need tape to section off your nail. Put a piece of tape down each edge of your nail, leaving the middle section. Now paint the middle stripes with white polish, and pull the tape off your nail while the white us still wet. 

This will leave you with a two-tone sectioned effect on your nail. Now comes more waiting. You'll need to wait as long as you can for the white to dry. If it's still tacky then you won't be able to do the next stage. 


Take your black nail art pen and fill in your white section with roses. To create the roses build up small lines for the petals like in the pictures. And that's it! 


This mani is so simple, but so effective and I was really pleased about how it looks. Just make sure the roses are really dry before adding the top coat to avoid them streaking. 

Nicole x 

Sunday 11 May 2014

The Cosmo blog awards

Hey everyone just a quick post to ask for your support at the Cosmo blog awards. The awards is a great place for us bloggers to get recognition for our blogs, and help get our names out there! Thank you all for your support! 

You can vote here

Nicole x 

Please nominate me! 
www.nicolesnailsuk.blogspot.co.uk


  'Best New Beauty Blog'


Seeing Stars: My Quick Sunday Mani

Hey everyone, happy Sunday! Now I know I don't usually post at the weekend but today I've just got a small little post for you to have a read of. 


My last post used BarryM's 'Green Berry' with a quilted effect. I love this colour so much I decided to do another mani with it, and I also wanted to use my BarryM pink nail art pen as I don't get to use it much. 


So I literally just doodled to be honest. I like to have something different on each nail so I went with a star theme and also added stripes and polkadots, because you can never go wrong with those in a mani! 


So I hope you like my Sunday mani. See you all next week where I've got some awesome manis to show you.

Nicole x 

@nicolesnailsuk

Friday 9 May 2014

Tutorial time!

Hi everyone. Today I've got a little tutorial time for you to learn. Now those of you that follow me on twitter will know I had a fairly unsuccessful evening of nail art last night, which was very frustrating! 

Anyway, one of the manis I tried was this one, which came out the best. Quilted nails is something I've attempted lots of times, trying lots of different methods but so far I hadn't found one that I could make work, until now :)

To start off with, choose your base colour. I've gone with a new purchase of mine, BarryM's 'Green Berry'. This colour is a gorgeous bright turquoise, and it's from their Gelly range so has a lovely shine to it. 

To start your mani put two very thin layers of your chosen colour on your nails. Then wait as long as you can until your nails are dry. 


For the quilting, I've chosen to just do my accent ring finger. I've used very thin nail tape for this. You could cut normal or masking tape into very thin stripes, but it will be soo time consuming, it's worth spending a couple of pound on ebay for nail tape! 

Stick the tape onto your nail in a criss-cross pattern, making sure all of its stuck down firmly. Then use the same polish again to paint over the top of the tape.

You then need to pull the tape off, while the paint is still wet. It's also a good idea to keep in mind the order you put the tape on so you can pull them off in the right order (backwards). 


And that's it! It's not as tidy as I would like, but I think that may be because I didn't pull the tape off quick enough. But at least I've finally found a way to create quilting that actually works! 

Nicole x 

Wednesday 7 May 2014

Purple Bows

Hi everyone, welcome to today's post. Today I've got a Rimmel swatch from their new Rita Ora range. The dark purple colour is called 'midnight rendezvous' (loving the name!) and it's a gorgeous really dark purple. 

The polish goes on lovely and smooth, and of course dries super quick as it's one of their '60 seconds' range. I've only used 2 coats for today's mani. 

I wanted an accent nail as usual, so sticking with Rimmel I used their purple Space Dust polish 'moon walking' which is one of my favourite textured glitters. You can see my swatches of this polish here

Now those of you that follow my Instagram will know I received some nail mail last week in the shape of some gorgeous little bows. So using some nail glue I added them onto my accent nail for this mani. 


With this post you're getting two manis for the price of one when after a couple of days I decided to try the mani with a lighter purple (partly for the blogs benefit and partly because I glued the bow on so well I couldn't get it off! Haha!). I used BarryM's Gelly polish 'Prickly Pear' for this, and found that the mani worked nicely with the lighter polish, but I think it was definitely more effective with the darker colour. 


So I hope you like today's mani, let me know which of the two you prefer. 

See you soon for more designs. Also I would be really grateful to any of you if you wanted to nominate my blog for the Cosmo blog awards for best newcomer/best new blog. Thanks! :) vote here!

Nicole x
@nicolesnailsuk

Monday 5 May 2014

Papaya Leopard Print

Hey everyone! I hope you've all had a lovely bank holiday Monday. Today I've got a nice little design for you to try, to make you feel nice and summery. 

So as the weather is nice and sunny here for a change I wanted a nice bright coloured mani to suit and BarryM's 'Papaya' was perfect for my mood :)


'Papaya' is a lovely bright coral colour and to go with it I thought I'd use my new purchase, BarryM's 'Crystal Glaze'. Now this is a really nice pale coral top coat with strips of glitter in there, but without being sparkly (if that makes sense!). When the light hit the Crystal Glaze it was pretty but I think it would work better over white not a coral colour, as it wasn't overly obvious. 


I also decided to add a leopard print design. I've done a small, more controlled leopard print on the blog before (see it here) but this was a bigger design and it came out really well. 


To do the leopard print I just added different shapes and sizes of gold to the coral and then once these were dry I used my BarryM pen to roughly draw around the edges of each gold patch. 

So I hope you like today's design. Enjoy the rest of your bank holiday! 

Nicole x 

@nicolesnailsuk 

Friday 2 May 2014

Black and gold #2

Hey everyone, today I've got another little idea for you all to try at home. A little while ago I posted a nice and simple black and gold mani (see it here) using my BarryM matte black. I really love the bold, striking look black and gold manis give, and today's mani is no exception!

Now I needed a mani to go with a black dress and gold accessories ready for a friends charity ball, and this design went perfectly and I created it just by having a little play around (along with a few failed attempts at ideas!).


I started with two base colours on alternate fingers. Some black and some gold. Once these were dry I used my black BarryM nail art pen and literally scribbled out the middle section of two nails. I was really surprised at how effective this simple little trick was! 


I then decided the mani still needed something extra, and for once this wasn't glitter! So I grabbed some yellowy/gold gems and placed them down one side of the remaining nail to contrast against the black base colour. To do this, you literally just need to add a layer of top coat to the nail, place the gems in the desired place and then put a couple of layers of top coat over them to seal them down. Nice and easy! 

So I hope you like today's design. Return soon to see more! :) 

Nicole x

@nicolesnailsuk (Twitter and Instagram)